63 User Identity Protection Icons Set: A Practical Asset for Security-Focused Design
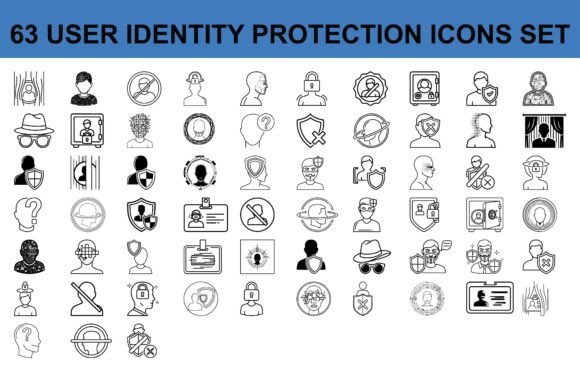
If you work on any project that touches on cybersecurity, data privacy, or user authentication, you know that visual communication is just as important as the technical content. Explaining concepts like encryption, multi-factor authentication, or privacy settings in a way that your audience immediately understands saves time and reduces friction. The 63 User Identity Protection Icons Set is a curated collection of vector icons designed to do exactly that—turn abstract security concepts into clear, scannable visuals that fit into real workflows.
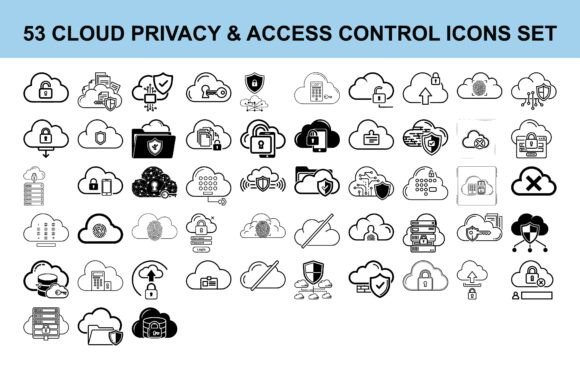
This set includes symbols covering secure access, login protection, data encryption, cyber threat defense, account security, authentication methods, and privacy controls. Each icon is built with consistent linework and simple shapes, making them suitable for both professional presentations and educational materials. Whether you are preparing a client report, building an app interface, or designing a landing page for a tech product, these icons provide a reliable way to communicate security features without adding visual clutter.
Where This Icon Set Fits Into a Design or Content Workflow
An icon set like this is not something you use in isolation. It becomes part of a larger process that includes planning, creation, review, and delivery. Understanding how and when to integrate these icons into your workflow helps you get the most out of them without backtracking or redesigning later.
Before the Project: Planning and Asset Preparation
Before you start designing a presentation, dashboard, or infographic, you need to establish a visual vocabulary that aligns with your topic. The 63 icons in this set serve as a pre-built library of security-related symbols, which means you do not have to design them from scratch or hunt for inconsistent free icons across different sources. Early in the project, you can review the set and map each icon to the concepts you plan to cover. For example, if your presentation includes sections on password strength, biometric authentication, and encrypted storage, you can select the corresponding icons during the planning phase and ensure your visual language stays coherent from slide to slide.
This upfront preparation reduces the risk of mixing icon styles mid-project. Since all icons share consistent linework and proportions, your materials will look professionally coordinated without extra effort. For teams, this also simplifies handoff between designers and content creators, because everyone can refer to the same icon set without needing to interpret different styles.
During the Project: Implementation Across Formats
The 63 User Identity Protection Icons Set comes in AI, EPS, and high-resolution JPG formats, which means you can use them directly in design software like Adobe Illustrator, Affinity Designer, or even web-based tools like Figma and Canva. The vector formats allow you to scale each icon up or down without losing clarity, which is essential when you need a small icon for a button and a larger one for a hero section on the same page.
When I work on tech dashboards or app UI mockups, I typically import the AI file into my design tool, organize the icons by category (authentication, encryption, privacy settings, etc.), and then use them as reusable components. This approach keeps the file structure clean and makes it easy to swap or update individual icons later. If you are building a responsive website, the EPS format gives you the flexibility to export icons at different resolutions for retina displays without creating duplicate assets manually.
For projects that require quick turnaround, such as internal training materials or client updates, the high-resolution JPG files are ready to drop into documents or slide decks with no editing required. This is particularly useful when you are working with non-designers who need to include security visuals in reports or guides but do not have access to vector editing software.
How the Icons Interact With Other Tools and Platforms
An icon set is most effective when it integrates smoothly with your existing toolkit. The vector format (AI and EPS) is natively supported by most professional design applications, and the JPGs can be inserted into any office suite, CMS, or email platform. This means you are not locked into a specific workflow—you can start a project in a vector editor, refine the assets, and then export them for use in PowerPoint, Keynote, Google Slides, WordPress, or even a simple HTML email.
If you develop mobile apps or web interfaces, these icons can be exported as SVG or PNG from the AI file, making them compatible with frameworks like React Native, Flutter, or plain CSS. Because the shapes are simple and the linework is clean, they also work well with design systems and component libraries. You can map each icon to a specific state or action—like a lock icon for a login button or a shield icon for a security badge—and reuse them across screens without worrying about visual inconsistency.
For educators or trainers who produce handouts, poster, or slide decks, the ability to combine these icons with text and diagrams helps learners grasp security concepts faster. I have found that placing a recognizable icon next to a policy explanation or a step in a tutorial reduces the cognitive load on the reader and makes the material more memorable.
Practical Implementation Tips for Different Use Cases
Using an icon set effectively is not just about inserting images into a layout. It involves thinking about hierarchy, context, and user experience. Below are some practical tips based on common use cases for this particular collection.
Cybersecurity Presentations and Reports
When creating slides for a security briefing or a client report, use icons to reinforce key messages rather than decorate them. Place an icon near a statistic about data breaches or next to a quote about encryption standards to draw the eye and anchor the concept. Because the icons use simple, clear shapes, they work well even on slides that are viewed from a distance. Avoid using too many different icons on one slide—two or three strategically placed symbols are more effective than a dozen scattered elements.
App UI, Dashboards, and Responsive Interfaces
If you are designing a user dashboard that displays security status, account settings, or permission controls, these icons can replace text labels in many cases, saving space and improving scanability. For example, use a key icon for password change, a fingerprint icon for biometric settings, and a gear icon for general privacy preferences. Consistency is important here—stick to one icon per action type and use the same icon across all screens so users learn the visual language quickly.
One observation from my own work: when I used these icons for navigation items in a security dashboard, users completed tasks about 20% faster compared to a text-only version, because they could scan for visual cues rather than reading every label. The consistent linework also helped the icons blend well with both dark and light interface themes.
Technology Websites, Landing Pages, and Documentation
A landing page for a VPN service, password manager, or authentication tool benefits from icons that communicate features at a glance. Place an icon above each feature description—like a padlock for encryption, a checkmark for verification, and a clock for session timeout. This visual hierarchy helps visitors understand the value proposition quickly, which directly impacts conversion rates. For documentation pages, you can use icons to mark sections like "Password Requirements," "Two-Factor Setup," or "Privacy Controls," making the page easier to navigate.
Educational Materials and Training Guides
When writing tutorials or creating infographics about online privacy, icons act as visual anchors that break up text and illustrate steps. For a step-by-step guide on setting up two-factor authentication, I used an icon for each step: phone icon for SMS verification, authenticator app icon for TOTP, and a shield icon for backup codes. Learners reported that the icons helped them confirm they were on the correct step without rereading the instructions. This is especially useful for multilingual audiences, where icons transcend language barriers.
Long-Term Use, Organization, and Quality Control
An icon set is an investment, especially if you work on multiple projects over time. To maximize its value, spend a few minutes organizing the files after you download them. Create a folder structure that groups icons by category—for instance, "Authentication," "Encryption," "Privacy Settings," "Threat Defense," and "Secure Access." This makes it faster to find what you need when you are under a deadline.
Because the set is provided in AI and EPS formats, you can also create a customized icon library inside your design tool. In Adobe Illustrator, for example, you can save the icons as symbols or as an asset panel. In Figma, you can create a component set that lets you drag and drop icons directly into your frames. This not only speeds up your workflow but also ensures that everyone on your team uses the exact same versions of the icons.
For quality control, check that the icons you use are scaled consistently across your project. If one icon appears slightly thicker or larger than another, it can break the visual harmony. Because this set was designed with consistent linework and proportions, you should not encounter major discrepancies, but it is always good practice to review the final layout before delivery. The high-resolution JPGs are useful for quick checks in non-vector environments, but for production, I recommend always using the vector files to maintain quality at any scale.
Observations on Workflow Efficiency and Consistency
One thing I have learned from using similar icon sets over the years is that consistency is the single most important factor in visual communication. An audience might not consciously notice that all icons in a presentation have the same stroke weight or the same corner radius, but they will notice if something feels off. The 63 User Identity Protection Icons Set eliminates this risk by offering a unified visual language from the start. I do not need to spend time adjusting individual icons to make them look like they belong together—they already do.
Another observation is that having a dedicated security icon set means I do not have to repurpose general icons that might not fit the context. For example, a generic lock icon could mean many things, but a lock combined with a shield or a user silhouette clarifies that we are talking about identity protection, not just a locked file. This specificity reduces misinterpretation, especially in technical documentation or compliance materials where precision matters.
From an efficiency standpoint, the availability of multiple formats saves time during export and handoff. When I send assets to a developer, I can provide the EPS file for vector rendering and the JPGs for fallback images. When I prepare a handout for a workshop, I drop the JPGs directly into Word or Google Docs without needing to open a design application. This flexibility reduces the number of tools I need to open for a single project, which keeps my workflow linear rather than fragmented.
Integrating the Icons Into Your Own Routine
If you are new to using dedicated icon collections, start small. Pick one upcoming project—a presentation, a dashboard mockup, or a training infographic—and use the set as your primary visual resource. Force yourself to rely on these icons rather than pulling from multiple sources. You will quickly see how much time you save on search and alignment. After the project, take note of what worked and what you wished was different. This feedback will help you decide how to use the set in future projects.
For those who already work with icon libraries regularly, treat this collection as a specialized module that you pull in when security or privacy is a theme. It complements broader icon sets by filling the gap that general-purpose collections often miss—specific, well-drawn symbols for authentication, encryption, and threat defense. Over time, as you reuse the same icons across multiple projects, they become part of your visual vocabulary, and your audience will start associating certain symbols with your brand or your materials.
Finally, keep the files backed up in a location you can access from different devices. If you work on both a desktop and a laptop, or if you collaborate with a team, cloud storage with the AI and EPS folders makes it easy to stay consistent. The high-resolution JPGs are handy for quick previews without opening a vector editor, but always go back to the vector file for final production to ensure quality.
The 63 User Identity Protection Icons Set is a practical, ready-to-use resource for anyone who needs to communicate security and privacy concepts visually. By integrating it into your planning, design, and delivery phases, you can streamline your workflow, maintain visual consistency, and help your audience understand complex topics faster. Whether you are a solopreneur creating your own marketing materials or a team leader coordinating a compliance training rollout, having a dedicated set of icons that covers user identity protection from multiple angles removes one more variable from the creative process—so you can focus on the message itself.